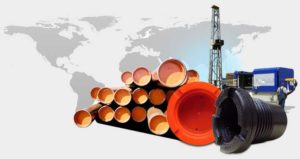
In the oil and gas industry, threading is crucial in constructing durable, leak-proof pipelines that withstand high pressure, extreme conditions, and rigorous operations. Threading pipes enable secure connections for transporting oil, gas, and other fluids across long distances.
Properly threaded pipes ensure that pipelines remain strong, efficient, and resistant to the harsh environments often encountered in the energy sector. This step-by-step guide will walk you through the pipe threading process.
What Is Pipe Threading?
Pipe threading involves cutting spiral grooves (threads) into the ends of metal pipes and connecting them to other fittings or valves. These threaded connections ensure pipelines can safely transport hydrocarbons without leakage. For drilling operations, pipeline construction, or facility maintenance, threading forms the energy industry’s backbone of fluid transportation systems.
Steps for Threading Pipes
1. Measure and Mark the Pipe
The first step in threading oil and gas pipes is determining the required length for the specific application, whether for a downhole tool or rig. Use a tape measure to mark where the pipe will be cut, accounting for the thread length. Be sure to adhere to industry-standard thread length for the particular application, as pipelines in oil and gas can operate under extreme pressure, requiring precision in measurement.
2. Cut the Pipe
Cutting oil and gas pipes requires precision due to their thickness and material composition, typically steel or high-grade alloys. Use a heavy-duty pipe cutter or hydraulic saw to make a clean, even cut at the marked point. These tools are designed to handle thick-walled pipes commonly used in the industry. Ensure the cut is smooth and square to allow for proper threading.
3. Ream the Pipe
Once the pipe is cut, it’s essential to remove any burrs or sharp edges. Use a reamer designed for heavy metal pipes to clean up the internal surface. Burrs can interfere with the threading process and compromise the integrity of the threaded joint, especially in high-pressure oil and gas pipelines.
4. Secure the Pipe in a Vise
Next, secure the pipe in a vise capable of handling the weight and size of oil and gas pipelines. The vise should hold the pipe firmly in place without damaging the surface. This equipment is crucial to ensure the pipe doesn’t move during threading, which could result in uneven or misaligned lines.
5. Select the Correct Die Size and Type
Oil and gas pipes typically require specific thread types, such as API (American Petroleum Institute) thread standards, commonly used for drilling, casings, and tubing in the energy sector. Choose a die head and dies that match the pipe size and thread type. The threading should be compatible with the pipe material, as oil and gas applications often use hard alloys.
6. Lubricate the Pipe and Die
Due to the thickness and toughness of the materials, lubrication is essential when threading oil and gas pipes. Apply cutting oil generously to the pipe and die before starting the threading process. This reduces friction and prevents overheating, which can compromise the thread quality.
7. Thread the Pipe
Once the pipe is securely held in the vise and lubricated, align the die head with the end of the tube and engage the threading machine. Industrial-grade machines are typically used for oil and gas pipes as they provide the power and precision needed to thread large-diameter pipelines. Allow the machine to rotate the die around the pipe, cutting the threads as it progresses.
Ensure you maintain consistent pressure and lubrication throughout the process. Continue threading until the die reaches the end of the pipe. Most machines will have an automatic stop mechanism to prevent over-threading, which could weaken the pipe or compromise its integrity.
8. Apply Thread Sealant
Before connecting the threaded pipe to another section, apply a sealant or PTFE tape specifically rated for high-pressure, high-temperature environments. These sealants help ensure a secure, leak-proof connection that can handle the demanding conditions of oil and gas operations. Wrap the tape tightly around the threads, ensuring full coverage without gaps or overlaps.
9. Test the Connection
In the oil and gas industry, testing is a crucial step to ensure the integrity of the threaded connection. After assembling the threaded joint, perform a pressure test to check for leaks. This may involve using air, water, or gas pressure to simulate operating conditions. Disassemble the connection, reapply the sealant, and retest if leaks are detected.
Master Pipe Threading Today
Understanding pipe threading will help ensure the integrity and efficiency of your oil and gas infrastructure, whether you’re working in production or pipeline construction. If you have further questions or need expert advice, look no further than MSI Pipe Protection Technologies for guidance on optimizing your pipe threading processes and ensuring industry compliance. Call us now!